[SpringBoot] 스프링부트 + JPA를 이용한 CRUD 구현 2. 실행하기
18 May 2022 -
1 minute read
🎋 Mustache
머스테치(Mustache)를 이용해 화면을 만들어보자.

플러그인 설치 후
➡️
dependencies {
	...
    implementation('org.springframework.boot:spring-boot-starter-mustache')
	...
}
build.gradle > dependencies에 위와 같이 추가
➡️

오른쪽 상단에 뜨는 🐘🔄를 눌러주자.
🎋 Index 화면 만들고 실행해보기
-
resources/templates/layout/header.mustache
<!DOCTYPE html> <html lang="ko"> <head> <meta charset="UTF-8"> <meta http-equiv="X-UA-Compatible" content="IE=edge"> <meta name="viewport" content="width=device-width, initial-scale=1.0"> <title>스프링부트 게시판</title> <link href="https://cdn.jsdelivr.net/npm/bootstrap@5.2.0-beta1/dist/css/bootstrap.min.css" rel="stylesheet" integrity="sha384-0evHe/X+R7YkIZDRvuzKMRqM+OrBnVFBL6DOitfPri4tjfHxaWutUpFmBp4vmVor" crossorigin="anonymous"> </head> <body> -
resources/templates/layout/footer.mustache
<script src="https://ajax.googleapis.com/ajax/libs/jquery/3.6.0/jquery.min.js"></script> <script src="https://cdn.jsdelivr.net/npm/bootstrap@5.2.0-beta1/dist/js/bootstrap.bundle.min.js" integrity="sha384-pprn3073KE6tl6bjs2QrFaJGz5/SUsLqktiwsUTF55Jfv3qYSDhgCecCxMW52nD2" crossorigin="anonymous"></script> </body> </html> -
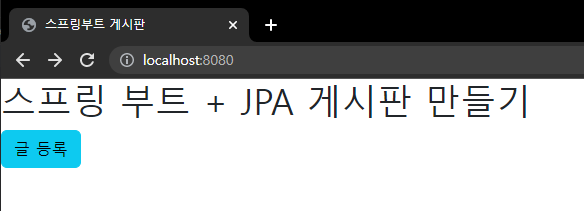
resources/templates/index.mustache
<h1>스프링 부트 + JPA 게시판 만들기</h1> <a href="/posts/save" class="btn btn-info">글 등록</a> -
src/main/java/com.test.spring.boot_crud/web/IndexController.java
  package com.test.spring.boot_crud.web;

  import org.springframework.stereotype.Controller;
  import org.springframework.web.bind.annotation.GetMapping;

  @Controller
  public class IndexController {

      @GetMapping("/")
      public String index(){
          return "index";
      }
  }
자 이제 실행해보자!
.
.
.
.
.


ㅋ 아 그럼 그렇지, 내가 한번에 될 리가 없다 ㅎ
🤷♀️ File > Settings > Build, … > Build Tools > Gradle projects > Build and run using / Run tests using
Gradle로 되어있던 것을 IntelliJ IDEA로 바꾸기.
다시 실행해보자. 😳
.
.
.
.
.


ㅅㅂ ㅠ
MySQL에서 create database ㄱㄱ -> application.propertie 파일을 열고
spring.datasource.driver-class-name=com.mysql.cj.jdbc.Driver
spring.datasource.url=jdbc:mysql://localhost:포트번호/DB명?useSSL=false&useUnicode=true&serverTimezone=Asia/Seoul
spring.datasource.username=username
spring.datasource.password=password
spring.jpa.show-sql=true
spring.jpa.hibernate.ddl-auto=update
spring.jpa.properties.hibernate.format_sql=true
위 내용 복붙하기. (포트번호, DB명, username, password 바꿀 것)
다시 다시 실행해보자.